Raspberry pi best heatsink comparison benchmark

raspberry_pi_3_heatsinks

Raspberry Pi manufacturer has stated that you don’t need heatsink for the normal operation of the Raspberry Pi device, however overclocked or heavily stressed devices will benefit from heatsink installation.
I decided to compare available heatsinks on the market and have found the best heatsink for Raspberry Pi 3.

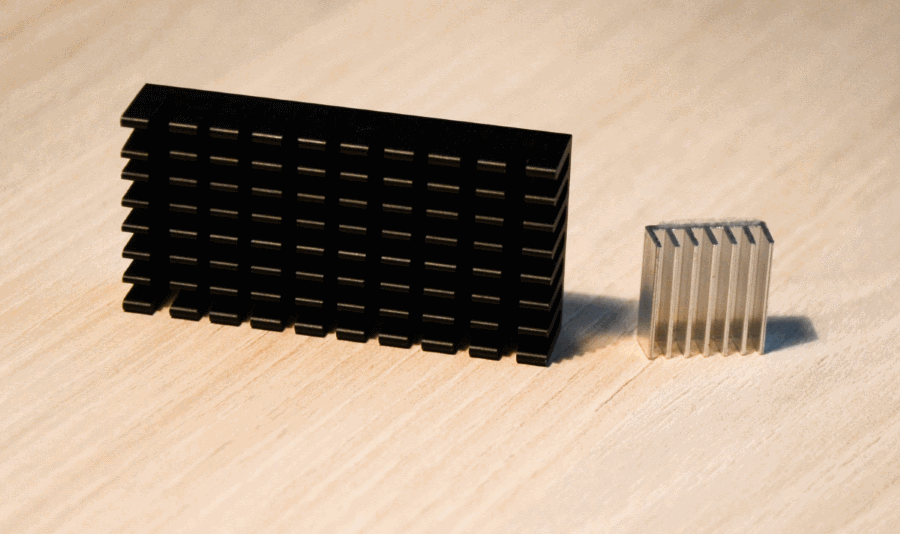
First tested heatsink is small – 14x14x6mm, priced 1$ on Ebay
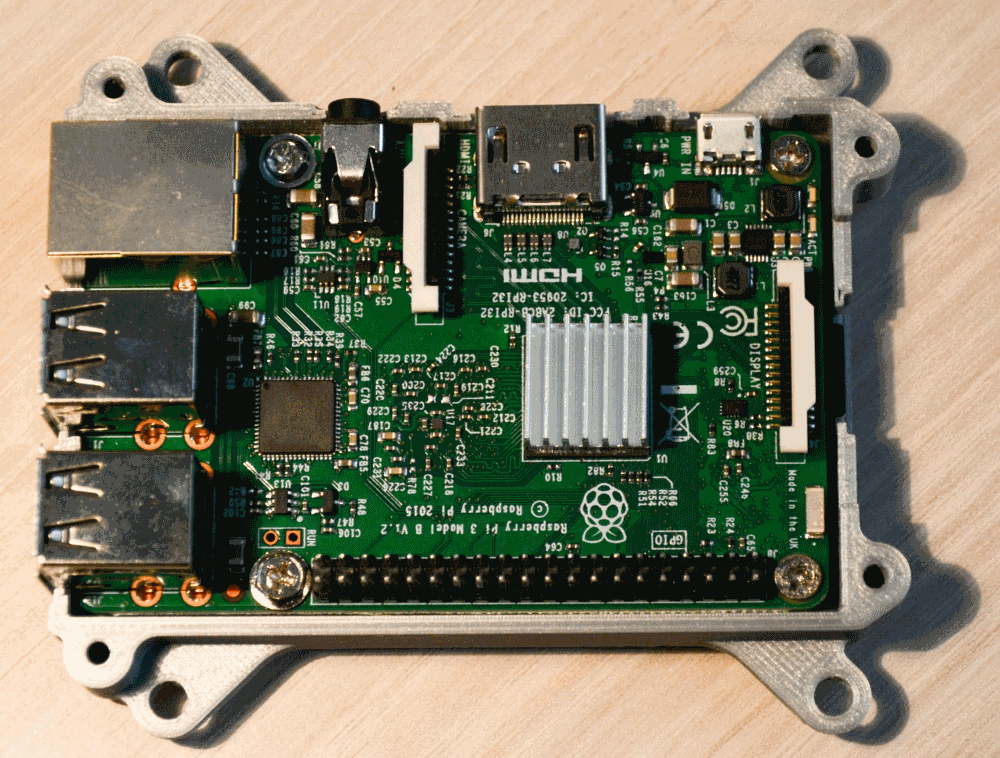
It has an adhesive layer for mounting on CPU.

raspberry_pi_small_heatsink

Second heatsink – is larger 50x25x10mm, also priced 1$

raspberry_pi_large_heatsink

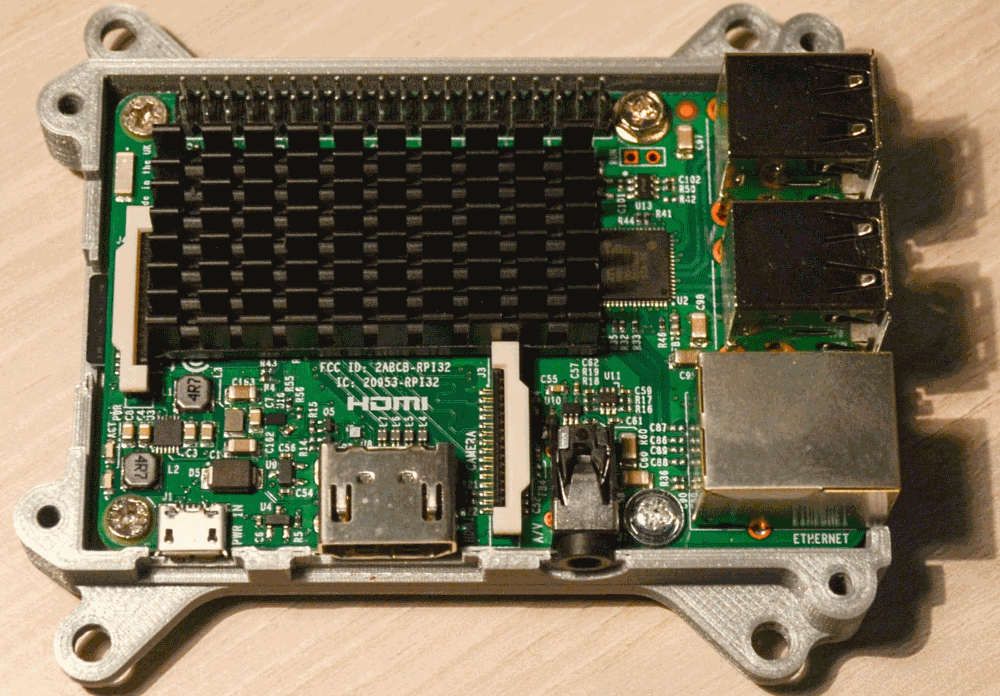
Mounting was done with Arctic Silver thermal compound and super-glue 🙂 Thermal compound was applied to the center and glue – to the corners of the chip.
Please note that this will be a permanent solution, and you will not be able to remove the heatsink.

For loading the CPU I used stress software (apt-get install stress).
Only 1 core of Raspberry Pi 3 was loaded – frequencies: arm_freq=1290 core_freq=430

Here are the temperature graphs:

raspberry_pi_temperature_heatsink

Red line – no heatsink.
Blue – small heatsink 14Ñ…14
Green – large heatsink 50Ñ…25

For a price of 1$ you can greatly improve temperature of Raspberry Pi 3 – by 8 degrees in idle state and by 13 degrees under moderate load.

Xperia Arc S distorted sound – earpiece replacement

After a year of active usage of my SE Xperia Arc S, I have faced a problem when sound, coming from a small front speaker became distorted. All voices had a buzzing effect as well.
Fortunately you can easily find an earpiece replacement for 2-3$ on ebay.
I have even bought a set with tools, to disassemble my phone. (Search for “Replacement Ear Earpiece Speaker+Tool for Sony Ericsson X12 Xperia Arc S” )

The replacement procedure in pretty simple, you just have to be careful and have a bit of patience. No soldering is required for the replacement.

Here is a procedure to replace the front speaker:

1. Detach the back cover, remove Battery, SIM and memory cards.

2. Unscrew 4 torx (star) shaped and 2 cross shaped bolts. Open HDMi cover.

SE Arc S back

3. Separate the covering panel. This can be easily done using your nail, or special tool starting from one of the phone corners.
Move the tool in clockwise direction and make a small gap between the screen and silver panel on the side of the phone.
Then increase the gap gradually until the panel comes off. Be gentle doing this as the side frame is pretty thin .

SE Arc S back
SE Arc S back

4. With the panel removed, locate the camera and gently bend it to the left, it should come off very easily.

SE Arc S back

5. On the right of the camera hides the earpiece we are going to replace. Move the small contact plate to the left, and pull it up gently. This will uncover the front speaker.

SE Arc S back

6. Extract the ear piece by using a flat screwdriver or an plastic tool, included in the earpiece set. It has a sticky coating on the other side. Remember the position of the speaker.

SE Arc S back

7. Put new earpiece in, press it down the socket, so it is firmly in place. Place the small covering plate back, make sure it is locked on the left side as it was before.
Position the camera back on it’s place, you may hear it clicks when locked.

8. Put the covering silver panel back on the base on the phone, as before – push it firmly down, so there is no gap left, do it gradually – moving clockwise around the borders.

9. Insert memory, SIM and Battery back. Turn on the phone and test the earpiece. Congratulations!